Code Signing
Code signing is an essential part of application distribution. On Windows, applications without code signatures are likely to be flagged as viruses. On OSX, codesigning and Notarization is required before your application can be run by users.
On both platforms, signing needs to be performed by Velopack itself, this is because the Velopack binaries (such as Update and Setup) need to be signed at different points in the package build process.
SmartScreen & Antivirus
On Windows, unsigned applications are frequently flagged by SmartScreen and antivirus software, and users may see a warning before they can run your app. The most reliable way to avoid this is to code-sign your application (see below), but signing alone is not always instant — SmartScreen warnings are driven by reputation, which builds up over time as more users run your signed binaries.
Here is the general rule of thumb for Windows Defender / SmartScreen warnings:
- You don't sign your code. You release MyApp-v1.exe. People get smart screen warnings for a while until the reputation on that file increases. You release MyApp-v2.exe. People get warnings again until MyApp-v2.exe builds up enough reputation.
- You sign your code with an OV certificate. You release MyApp-v1.exe. People get smart screen warnings for a while until the reputation on that certificate increases. You release MyApp-v2.exe. People don't get warnings because the certificate already has a good reputation. Eventually your certificate expires and it comes time to release MyApp-v47.exe. You renew your certificate, and people get warnings again until the new certificate builds up reputation.
- You sign your code with an EV (Extended Validation) certificate. People never get warnings, because EV certificates are granted instant SmartScreen reputation.
In short: code-sign, prefer an EV (or Azure Artifact Signing) certificate for instant reputation, and expect a short reputation-building period for OV certificates.
Signing on Windows
Acquiring a code signing certificate
Azure Artifact Signing
As of April 2024, the most effective way to code-sign your product is via Azure Artifact Signing (formerly known as Azure Trusted Signing).
- Costs USD$10/mo (or USD$120/yr) which is on-par or cheaper than code signing certificates from other issuers.
- Full cloud solution / Does not require any physical hardware (HSM) shipped to you.
- Signing can be automated (eg. in your CI pipeline)
- Artifact Signing certificates get built-in instant reputation for smart-screen and defender.
Artifact Signing can be used by following the Microsoft documentation for using Artifact Signing with signtool.exe, and then reading our docs below on how to configure signtool.exe with Velopack.
Other certificate vendors
If you instead wish to purchase a code signing certificate from a different vendor, Microsoft lists the following trusted issuers in their documentation:
There are also resellers which may have certificates from authorised issuers for lower prices, but the added risk is that you will get no official support for those certificates and identity verification procedures may be more convoluted.
Note that since June 1, 2023 there has been a policy change, meaning it is no longer possible to download your code signing certificate. It must be either stored in an authorised cloud HSM or a USB HSM will be shipped to you. Many of these solutions will require manual steps and not be compatible with automation / CI. Please review carefully before purchasing.
Signing via Azure Artifact Signing
Azure Artifact Signing (formerly Trusted Signing) is a managed signing service from Microsoft and one of the most cost effective ways to sign your application.
For detailed information on Azure Artifact Signing please refer to the official documentation.
Signing relies on signtool.exe which is only supported on Windows. If you are using a different operating system, you will need to sign your binaries on a Windows machine before deploying them.
- First you will need to create an Azure account at: https://azure.microsoft.com/pricing/purchase-options/azure-account. This account will need to have an active subscription.
- Register the Azure Artifact Signing resource provider. This can be done either in the Azure portal, or via the Azure CLI by following these instructions.
- Create the Azure Artifact Signing resource by following these instructions. Note the name and region that you select, as you will use these values later for the
CodeSigningAccountNameandEndpointvalues respectively, in the signing configuration JSON file. - Create an identity validation request by following these instructions. This step must be done in the Azure Portal. The identity validation can either be done for an Organization or an Individual developer. This process make take a while as the identity information is verified by Microsoft. Return to these steps after the identity validation process is completed.
- Create a certificate profile by following these instructions. There are multiple trust models that are supported. The Public Trust model is the most common and is suitable for most applications. Note the name of the certificate profile as you will use this value later as the
CertificateProfileNamein the signing configuration JSON file. - Velopack comes bundled with a version of signtool.exe (x64) and the dlib package that is compatible with Azure Artifact Signing. These components require the .NET 8.0 Runtime be installed on the machine that will be performing the signing. You can find the latest version of the .NET 8.0 runtime here.
- Setup authentication with Azure Artifact Signing.
signtool.exeleverages the common DefaultAzureCredentials class for authenticating with Azure. This class supports authenticating in a variety of ways, including the Azure CLI. After installing the Azure CLI, runaz login. This will provide signtool.exe the authentication it needs whenvpkinvokes it. If you are running inside of the GitHub Actions or Azure DevOps there is built in support that handles performing the needed authentication. - Create signing metadata JSON file. This file has three required paramters and an optional CorrelationId. The file should look like this:
The values from each of these can be found in the steps above where you created the Azure Artifact Signing resource, and the certificate profile. The file should be saved with UTF-8 (without a BOM) encoding. Though not required, this is often named as{"Endpoint": "<Artifact Signing account endpoint>","CodeSigningAccountName": "<Artifact Signing account name>","CertificateProfileName": "<Certificate profile name>"}
metadata.json. The full details can be seen here. - Pass the metadata JSON file. When calling
vpk packusing--azureTrustedSignFile <path to json file>.vpkwill pass the file through tosigntool.exeto sign the needed assets.
Signing via signtool.exe
Usually signing is accomplished via signtool.exe. If you already use this tool to sign your application, you can just pass your sign parameters straight to Velopack (minus the 'sign' command).
For example, if your signing command before was:
signtool.exe sign /td sha256 /fd sha256 /f yourCert.pfx /tr http://timestamp.comodoca.com
Then now with --signParams it would be:
vpk pack ... --signParams "/td sha256 /fd sha256 /f yourCert.pfx /tr http://timestamp.comodoca.com"
You should always pass absolute paths in your signing arguments, as there is no guarantee that signtool will be run in the same working directory as vpk.
If you are new to using signtool.exe, you can check the command line reference here. I recommend getting signing working on a single binary first, using signtool.exe, before trying to get things working with the Velopack CLI.
If you are using a USB / HSM and have the following signing error Error: SignerSign() failed." (-2147023673/0x800704c7), this means that you are missing a password / unlock token. This can be added to your signing command with the /csp /k parameters. [Read more]
Take care when providing parameters with spaces. You must wrap anything containing spaces with quotes and escape with a backslash. For example, --signParams "/n \"My Cert Name\"". If you are using an MSBuild <Exec> task or similar, you will need to use " instead.
By default, Velopack will sign 10 files per call to signtool.exe, to speed up signing and reduce the number of times you need to interact with the console if you are using some kind of interactive signing method. This can be disabled with the --signParallel 1 argument.
Custom signing commands and tools
If you have more advanced signing requirements, such as a custom signing tool (eg. AzureSignTool.exe), then you can provide a command template instead, where {{file}} is the binary that Velopack will substitute and sign:
vpk pack ... --signTemplate "AzureSignTool.exe sign ... {{file}}"
The above will sign one file at a time, but if your signing tool supports batch signing multiple files at a time, you can specify {{file...}} instead.
Cross Platform Signing
JSign is a versatile code signing tool that runs on Linux, macOS and Windows. It supports a wide range of signing algorithms and timestamping services.
To use it with Velopack do the following:
- Follow the steps above to setup Azure Artifact Signing
- Download the latest version of JSign from https://ebourg.github.io/jsign/#files
- Install the Azure CLI and login with
az login - Get an access token by running
az account get-access-token --resource https://codesigning.azure.net - Use the
--signTemplateoption to sign your files.
vpk pack ... --signTemplate "jsign --storetype TRUSTEDSIGNING --keystore <region> --storepass <api-access-token> --alias <account>/<profile> {{file}}"
Signing & Notarizing on OSX
Codesigning and Notarization is required before your application can be run by users, therefore it is a required step before deploying your application.
Creating code signing certificates
- First, you will need to create an account at https://developer.apple.com, pay the annual developer fee, and accept any license agreements.
- Navigate to your certificates: https://developer.apple.com/account/resources/certificates
- Click the (+) icon to create new certificates. You need to create both a
Developer ID Installerand aDeveloper ID Applicationcertificate for distribution of Velopack apps outside the Mac App Store.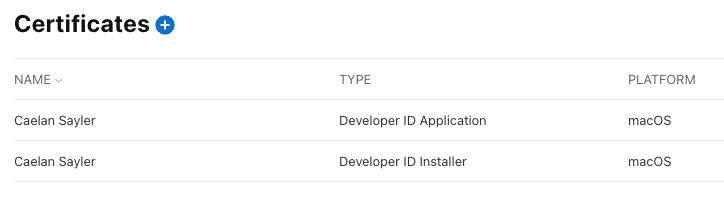
- Open both certificates by clicking on them, press Download, and then double click the ".cer" file to install it to your local keychain.
If your certificates show as untrusted in Keychain Access, or you receive a warning like "Warning: unable to build chain to self-signed root for signer "Developer ID Application: YourName", you are probably missing a development certificate on your machine which can be downloaded from here: https://www.apple.com/certificateauthority/
Setting up a NotaryTool profile
- Create an app-specific password: https://support.apple.com/en-us/102654. You will only be shown this password once, so save or write it down somewhere.
- Find your apple team ID: https://developer.apple.com/account#MembershipDetailsCard
- Store your Apple account credentials to a new NotaryTool profile:
xcrun notarytool store-credentials \--apple-id "yourapple@account.com" \--team-id "your-located-team-id" \--password "your-generated-app-specific-password" \"your-local-profile-name-here"
Putting it all together
Now that you have your NotaryTool profile and code signing certificates installed, you can add the following parameters to your pack command:
vpk pack \
    ...
    --signAppIdentity "Developer ID Application: Your Name" \
    --signInstallIdentity "Developer ID Installer: Your Name" \
    --notaryProfile "your-local-profile-name-here" \
When these parameters are specified and valid, Velopack will automatically code sign and notarize your application and installer packages.
Velopack will use codesign and xcrun notarytool to sign and notarize your application. By default they will use the default keychain on your device to discover certificates and the notary profile.
If you would like to use a different keychain, you must install your certificates and create your notary profile on that keychain and use the Velopack --keychain {path}
argument to specify that Velopack should discover certificates from a non-default keychain.
If you do not provide an entitlements file for hardened runtime, one suitable for most dotnet apps will be provided for you automatically. If your app requires
special entitlements and the defaults are not suitable, you should supply your own signing entitlements using --signEntitlements {path}. Note that the macOS App
Sandbox entitlement (com.apple.security.app-sandbox) is not supported by Velopack — see the macOS limitations note for details.
By default Velopack performs a "deep" signing of all binaries inside your bundle. If you would prefer to pre-sign your own binaries and have Velopack skip them,
you can pass --signDisableDeep.
Even though your certificate may appear as Developer ID Application: Your Name (TeamName) in Keychain Access, you should not specify the team name as a part of
your --signAppIdentity or --signInstallIdentity arguments. Your certificate should just be Developer ID Application: Your Name with no team.
Automate signing in CI/CD (Github Actions)
It is also posible to store your certificates and notary credentials as Action Secrets and sign your code during CI builds.
- Github Actions
- Azure DevOps
-
Launch Keychain Access and open the "My Certificates" pane.
-
Select each certificate (one at a time), right click and select "Export". Save as a p12 file and make note of the password. You can use the same password for both certificates.
tipIf you can't see the export option, or exporting as a
.p12is disabled, you may need to change which keychain or tab you are viewing. You should be on the "My Certificates" tab. See https://stackoverflow.com/questions/15662377/unable-to-export-apple-production-push-ssl-certificate-in-p12-format for more information. -
Copy the contents of the certificate to clipboard as base64, example:
base64 -i CERT.p12 | pbcopy -
Create 7 Github Secrets for your Actions workflows
BUILD_CERTIFICATE_BASE64(b64 of your app cert)INSTALLER_CERTIFICATE_BASE64(b64 of your installer cert)P12_PASSWORD(password for the certificates)APPLE_ID(your apple username)APPLE_PASSWORD(your app-specific password from the notary step above)APPLE_TEAM(your team id from the notary step above)KEYCHAIN_PASSWORD(can be any random string, will be used to create a new keychain)
-
Add a step to your workflow which installs the certificates and keychain profile. Here is an example:
name: App build & signon: pushjobs:build_with_signing:runs-on: macos-lateststeps:- name: Checkout repositoryuses: actions/checkout@v4- name: Install Apple certificates and notary profileenv:BUILD_CERTIFICATE_BASE64: ${{ secrets.BUILD_CERTIFICATE_BASE64 }}INSTALLER_CERTIFICATE_BASE64: ${{ secrets.INSTALLER_CERTIFICATE_BASE64 }}P12_PASSWORD: ${{ secrets.P12_PASSWORD }}APPLE_ID: ${{ secrets.APPLE_ID }}APPLE_PASSWORD: ${{ secrets.APPLE_PASSWORD }}APPLE_TEAM: ${{ secrets.APPLE_TEAM }}KEYCHAIN_PASSWORD: ${{ secrets.KEYCHAIN_PASSWORD }}run: |# create variables for file pathsCERT_BUILD_PATH=$RUNNER_TEMP/build_certificate.p12CERT_INSTALLER_PATH=$RUNNER_TEMP/installer_certificate.p12KEYCHAIN_PATH=$RUNNER_TEMP/app-signing.keychain-db# import certificates from secretsecho -n "$BUILD_CERTIFICATE_BASE64" | base64 --decode -o $CERT_BUILD_PATHecho -n "$INSTALLER_CERTIFICATE_BASE64" | base64 --decode -o $CERT_INSTALLER_PATH# create temporary keychainsecurity create-keychain -p "$KEYCHAIN_PASSWORD" $KEYCHAIN_PATHsecurity set-keychain-settings -lut 21600 $KEYCHAIN_PATHsecurity unlock-keychain -p "$KEYCHAIN_PASSWORD" $KEYCHAIN_PATH# import certificates to keychainsecurity import $CERT_BUILD_PATH -P "$P12_PASSWORD" -A -t cert -f pkcs12 -k $KEYCHAIN_PATHsecurity import $CERT_INSTALLER_PATH -P "$P12_PASSWORD" -A -t cert -f pkcs12 -k $KEYCHAIN_PATHsecurity list-keychain -d user -s $KEYCHAIN_PATH# create notarytool profilexcrun notarytool store-credentials --apple-id "$APPLE_ID" --team-id "$APPLE_TEAM" --password "$APPLE_PASSWORD" velopack-profile- name: Compile your app...- name: Create Velopack Releaserun: |dotnet tool install -g vpkvpk pack ... \--signAppIdentity "Developer ID Application: Your Name" \--signInstallIdentity "Developer ID Installer: Your Name" \--notaryProfile "velopack-profile" \--keychain $RUNNER_TEMP/app-signing.keychain-db# Or use dnx instead of installing globally:# - name: Create Velopack Release# run: |# dnx vpk --version 1.0.0 pack ... \# --signAppIdentity "Developer ID Application: Your Name" \# --signInstallIdentity "Developer ID Installer: Your Name" \# --notaryProfile "velopack-profile" \# --keychain $RUNNER_TEMP/app-signing.keychain-db# Replace 1.0.0 with your Velopack package version# Learn more: https://learn.microsoft.com/dotnet/core/tools/dotnet-tool-exec?WT.mc_id=DT-MVP-5003472- name: Clean up keychainif: ${{ always() }}run: security delete-keychain $RUNNER_TEMP/app-signing.keychain-db
The documentation here for Azure DevOps is provided by the community and is not verified by the Velopack team.
-
Launch Keychain Access and open the "My Certificates" pane.
-
Select each certificate (one at a time), right click and select "Export". Save as a p12 file and make note of the password. You can use the same password for both certificates.
tipIf you can't see the export option, or exporting as a
.p12is disabled, you may need to change which keychain or tab you are viewing. You should be on the "My Certificates" tab. See https://stackoverflow.com/questions/15662377/unable-to-export-apple-production-push-ssl-certificate-in-p12-format for more information. -
Copy the contents of the certificate to clipboard as base64, example:
base64 -i CERT.p12 | pbcopy -
Create 7 secrets in Azure Key Vault and expose it to Azure DevOps under the "Apple signing" variable group. Note that we use Key Vault instead of DevOps secrets because our certificates are too large (over 4K) to store in DevOps secrets.
P12-PASSWORD(password for the certificates)APPLE-ID(your apple username)APPLE-PASSWORD(your app-specific password from the notary step above)APPLE-TEAM(your team id from the notary step above)KEYCHAIN-PASSWORD(can be any random string, will be used to create a new keychain)BUILD-CERTIFICATE-BASE64(base64 of your app cert)INSTALLER-CERTIFICATE-BASE64(base64 of your installer cert)
-
Add steps to your pipeline to load the secrets, sign, and teardown:
The YAML to set things up:
variables:- group: Apple signingsteps:- bash: |# create variables for file pathsCERT_BUILD_PATH=$AGENT_TEMPDIRECTORY/build_certificate.p12CERT_INSTALLER_PATH=$AGENT_TEMPDIRECTORY/installer_certificate.p12KEYCHAIN_PATH=$AGENT_TEMPDIRECTORY/app-signing.keychain-db# import certificates from secretsecho -n "$BUILD_CERTIFICATE_BASE64" | base64 --decode -o $CERT_BUILD_PATHecho -n "$INSTALLER_CERTIFICATE_BASE64" | base64 --decode -o $CERT_INSTALLER_PATH# create temporary keychainsecurity create-keychain -p "$KEYCHAIN_PASSWORD" $KEYCHAIN_PATHsecurity set-keychain-settings -lut 21600 $KEYCHAIN_PATHsecurity unlock-keychain -p "$KEYCHAIN_PASSWORD" $KEYCHAIN_PATH# import certificates to keychainsecurity import $CERT_BUILD_PATH -P "$P12_PASSWORD" -A -t cert -f pkcs12 -k $KEYCHAIN_PATHsecurity import $CERT_INSTALLER_PATH -P "$P12_PASSWORD" -A -t cert -f pkcs12 -k $KEYCHAIN_PATHsecurity list-keychain -d user -s $KEYCHAIN_PATH# create notarytool profilexcrun notarytool store-credentials --apple-id "$APPLE_ID" --team-id "$APPLE_TEAM" --password "$APPLE_PASSWORD" --keychain $KEYCHAIN_PATH velopack-profileenv:BUILD_CERTIFICATE_BASE64: $(BUILD-CERTIFICATE-BASE64)INSTALLER_CERTIFICATE_BASE64: $(INSTALLER-CERTIFICATE-BASE64)P12_PASSWORD: $(P12-PASSWORD)APPLE_ID: $(APPLE-ID)APPLE_PASSWORD: $(APPLE-PASSWORD)APPLE_TEAM: $(APPLE-TEAM)KEYCHAIN_PASSWORD: $(KEYCHAIN-PASSWORD)displayName: 🛠️ Install Apple certs and notary profileTear it down:
- bash: security delete-keychain $AGENT_TEMPDIRECTORY/app-signing.keychain-dbdisplayName: 🧹 Clean up keychaincondition: always()Sign on mac (assuming a powershell script):
# Add signing parametersif ($IsMacOS) {$vpkCommand += @('--signAppIdentity','Developer ID Application: Your Name','--signInstallIdentity','Developer ID Installer: Your Name','--notaryProfile','velopack-profile','--keychain','$(Agent.TempDirectory)/app-signing.keychain-db')}